Engineered hardwood makes your flooring more beautiful and durable. The interesting part about this hardwood is that it offers various ways for installation. But, do you know how to install an engineered hardwood floor? If no, we will explain here a few different ways to install engineered hardwood flooring.
There are some products that are designed especially for adhesive application. This hardwood is even used to install flooring over concrete slabs. Some products are great for fixing to a wood subfloor using staples or nails. This process of installation is known as a nail-down mechanism. For DIYers, the most effective way is the floating-floor mechanism, where you install the engineered hardwood using no nails or glue. So, let’s know about these different installation processes for engineered hardwood flooring right below.

What Is Engineered Hardwood?
Engineered hardwood is also known as man-made wood, composite wood, manufactured board, or mass timber. It includes an enormous variety of derivate wood items that are produced by fixing or binding the fibers, particles, wood, veneers, or strands of wood with different fixation methods like adhesives to produce composite material.
These items are engineered to defined design specifications. They are then tested so as to meet international or national standards. These engineered wood items are employed in a wide range of applications from commercial buildings to home construction. You can even use this hardwood for beams and joists as a substitute to steel in various building projects.
Usually, engineered wood items are created from similar softwoods and hardwoods used to produce lumber. Wood waste like sawmill scraps can also be employed for engineered wood made of fibers or wood particles.
Some Features of Engineered Hardwood
Hardwood flooring is an amazing way to produce timeless style to a room. If you are thinking of getting your floor designed through engineered hardwood, know some facts about this hardwood below!
- Engineered hardwood features high-performance and durable construction.
- This hardwood is built using multiple layers of wood. Here, every wood takes a different position and direction. This assembly stops the engineered wood from bowing or warping as what other woods do in moist regions.
- Engineered hardwood is better than solid hardwood as one can install this wood in every grade level of houses. It even works in houses below ground if one installs a defensive moisture fence.
- Hardwood veneers offer the look and natural beauty to the engineered hardwood floor.
- This hardwood proffers maintenance and care.
Things To Consider Before You Install Engineered Hardwood Flooring
When you spend in high-quality flooring, it offers you long-term advantages. This kind of flooring adds timeless beauty and elegance to the room, where it is installed. In addition, the engineered hardwood flooring lasts for many years. So, before you install this flooring, you have to consider some factors. Have a look at them right below!
1. Take into consideration the home interior
Before you select the wood floor type, you have to think about your home interior. It includes your door casings, furniture, trim work on cabinets, and other such elements. So, consider the properties and colors of the wooden items. Thus, the floor will not seem out of place.
2. Subfloor type
Every floor comprises of subfloors. Some of the common kinds of subflooring include particle boards, plywood, and concrete slabs. If the subfloor is made from particle boarding, you have to install plywood prior to engineered hardwood installation.
3. Sections that need the hardwood installation
You cannot install the engineered hardwood flooring in all the sections in your home. For instance, this kind of wood goes perfectly with spaces like basements.
4. Make a choice of staining and finishing
Engineered hardwood flooring is extremely popular and looks beautiful. However, you need to look after them properly. For maintenance, you have to polish them with various finishes. It even helps in reducing the possibilities of the flooring becoming dirty. You can put on the finishes to every kind of engineered hardwood floors.
5. Lifestyle
Another factor to consider while installing engineered hardwood flooring is your lifestyle. For instance, if you own pets in your home or organize too many parties, you should go with flooring that is scratch-resistant and hard. The perfect choice is to go with red oak wood.
6. Set your budget
You need to set your budget before you set out to buy engineered hardwood. The overall budget includes the installation cost and the maintaining cost. Also, you have to consider the removal and disposable cost of the previous floor. So, consider the overall budget!
7. Select the design
As you know, there are lots of varieties available for hardwood floors. Each one of them comprises its own grain patterns and special characteristics that make them unique.
So, choose the perfect one according to your preferences and requirements. It seems a bit complicated but when the flooring looks amazing, it offers great satisfaction.
A Few Notes Before You Start Off With The Installation Project
- Give at least two or three days to finish this installation project.
- Wear latex gloves and safety glasses.
- Check all floorboards for defects and warping.
- One cannot walk over the new floor for 24 hours. Hence, leave a strip bare and finish it the other day. So, make a plan keeping this point in mind.
- Buy a trowel having teeth to apply glue if you choose the glue-down process.
- Mix planks from diverse boxes to avoid color patches. Finishes and stains could vary from one batch to the other and mixing plants from diverse containers will create a unified appearance.
How To Install An Engineered Hardwood Floor?
Engineered hardwood flooring is so simple to install. This moisture-resistant hardwood is a perfect alternative to conventional hardwood floors. Now, use this stepwise guide on how to install engineered hardwood flooring in your house. Go through the instructions below!
Step 1: Prepare the floor
Before you install the engineered hardwood flooring, ensure that the subfloor is debris-free and clean. Take extra care to get rid of any staples or protruding nails if left from the earlier floor. It is better to vacuum, wash, and sweep the floor to eliminate any dust. Before you begin, ensure your floor has completely dried.
Step 2: Roll over tar sheets
Roll over the tar sheets on the subfloor and employ a nail gun to attach the sheet to your floor. The tar sheet will create a barrier to moisture. This will prevent condensation from the lower floors that could decay the underside of the new wood flooring.
Step 3: Prepare the planks
There are various natural colors available for any wood item. The only problem with engineered flooring is that colors could vary from one box to the other. To avoid tonal differences, it is better to intermix the wood planks.
Step 4: Install flooring
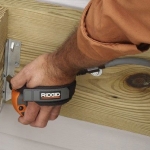
Begin to install the wood with the longest wall in your room. Slide these floor planks together as they are in groove-tongue style. Put the groove side towards the room and install the tongue side towards the wall. For installing planks, employ a pneumatic flooring stapler to force staple via the groove, where the angle should be 45 degrees. You have to staple after every 6-8 inches. If you find any difficulty, employ a rubber mallet for the same.
Now, continue to run rows of hardwood flooring so as to produce staggered seams of diverse length planks. When you reach the room’s other side, you will face difficulty in fixing the stapler into the last rows of the flooring due to the wall interference. If that’s the case with you, you require a finish nailer that will directly nail through the boards’ face. Meanwhile, remember to keep these nail holes to a minimum by placing a nail every 12-18 inches.
Tip: Employ a hammer and an awl to bury the nail heads below the floor surface. If they are not recessed, they will harm anyone who walks over them in stocking or bare feet.
Top 3 Best Finish Nailer
These are top 3 best finish nailer comparison table which will help you to make the best choice for your woodworking projects easily:
| Finish Nailer | Image | Power Source | Magazine Capacity/ | Shipping | Editor's Rating | Price |
|---|---|---|---|---|---|---|
| Hitachi NT65MA4 1-1/4 Inch to 2-1/2 Inch 15-Gauge Angled Finish Nailer |  | Pneumatic | 100 Nails /Angled | FREE Shipping |  (4.5 / 5) (4.5 / 5) | See on Amazon |
| NuMax SFN64 Straight Finish Nailer 16 Gauge Ergonomic & Lightweight Pneumatic |  | Pneumatic | 100 Nails /Straight | _ |  (4.3 / 5) (4.3 / 5) | See on Amazon |
| Metabo HPT NT65MA4 Pneumatic Angled Finish Nailer, 15 Gauge, 1-1/4-Inch up to 2-1/2-Inch | 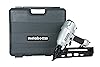 | Pneumatic | 100 Nails /Angled | FREE Shipping |  (4.8 / 5) (4.8 / 5) | See on Amazon |
Step 5: End flooring with thresholds and baseboard
To conceal the seams where the floorboards meet the wall, adjoin the baseboard to the wall bottom using a finish nailer. It is better to paint the baseboard before you install it. In order to cut it to the length of the doorway opening, take the help of a miter saw. Using an awl, you can move the nail heads down. In this way, they will sit down below the threshold surface. Now, you have successfully installed the engineered hardwood flooring.
How To Install Engineered Hardwood Flooring Using A Brad Nailer?
Engineered hardwood refers to a solid wood floor material, which is feigned from thin hardwood laminated layers. These layers are placed together to create plants having excellent dimensional consistency and great durability. Like other newer floor materials, people can install this flooring without nailing or gluing it to other wooden subfloors or plywood. To install engineered hardwood flooring, it is best to go with a flooring nailer. If you do not have this nailer, a brad nailer could even work if you shoot the correct nails at the right angle.
Materials Required:
- Compressor
- Flooring
- Tool oil
- Nail gun
- Brad nails
- Air hose
Top 3 Best Brad Nailers
These are top 3 best brad nailers comparison table which will help you to make the best choice for your woodworking projects easily:
| Brad Nailer | Image | Power Source | Magazine Capacity | Shipping | Editor's Rating | Price |
|---|---|---|---|---|---|---|
| Hitachi NT50AE2 18-Gauge 5/8-Inch to 2-Inch Brad Nailer |  | Pneumatic | 100 Nails | FREE Shipping | (4.5 / 5) | See on Amazon |
| DEWALT DWFP12231 Pneumatic 18-Gauge 2-Inch Brad Nailer Kit | 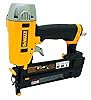 | Pneumatic | 100 Nails | FREE Shipping |  (4.4 / 5) (4.4 / 5) | See on Amazon |
| WEN 61720 3/4-Inch to 2-Inch 18-Gauge Brad Nailer |  | Pneumatic | 100 Nails | Check on Amazon | (4.8 / 5) | See on Amazon |
Once you have these things, it is time to install engineered hardwood flooring. For carrying out this task effectively, make sure you follow the steps mentioned above correctly.
Step 1: Switch on the compressor
Initially, you need to switch on the compressor after setting it up properly. Before that, do not forget to attach the air hose. Once done, enable the compressor to completely pressurize. After that, add some drops of the tool oil at the nailer’s bottom.
Step 2: Fill up the magazine
Next, open the nailer magazine. You will find this magazine at the front just below the barrel or plunger. These magazines usually open by pressing a clip present at the magazine bottom. Now, fill the magazine with nails having 1½ inches length.
Place the first line of boards having space about half an inch using tough wood spacers. The plank’s notched edge or groove should be placed in front of the wall with its tongue out.
Step 3: Attach the air hose
Before you attach the air hose to the nailer, it is advised to put on the safety glasses. Adjoin the brad nailer to the air hose by dragging the brass ring down, which is present near the fitting. Next, put in the nailer’s nipple fitting into the fitting of the hose. Once fitted, let go of the brass ring so as to set the brad nailer in one place. To remove the gun, you have to pull back the ring.
Step 4: Tilt the nailer
Now, place the brad nailer’s tip on the plank top in a corner, where the tab or tongue adjoins the plank face using the gun handle. Here, the gun handle will run parallel to the plank’s long edge. Next, you need to tilt the nailer as the plunger is still tilted towards your wall at an angle of 45 degrees.
Step 5: Press the trigger
You have to press the plunger tip tightly against the floorboard while maintaining your position still. It is going to release the safety mechanism of your gun. Now, keep on holding your gun and press the trigger. Examine the nail if it has driven perfectly into the wood. In case of any stick-out nail, tap its head using a hammer or a nail set so as to press the nails slightly underneath the surface.
Step 6: Drive the nails
Next, you need to drive a nail after every 12-16 inches. Install consequent rows by tapping them onto the primary row. Now, you have to nail by the tongue at an angle of 45 degrees. Leave out the final row next to the distant wall. The base shoe or quarter-round molding will keep that in place.
Conclusion
Now, you know how to install an engineered hardwood floor hassle-free. As stated above, there are various ways of installing engineered hardwood flooring. Here, we have explained different ways to install engineered hardwood flooring. You can install this kind of flooring using adhesives, stapler, nail gun, nailer, etc. Take the help from these tools and install the flooring effortlessly. Once done, it is time for you to admire your home like it’s new once again.


Speak Your Mind