Believe this fact or not, you can install a stunning hardwood follow in a week’s time. But how to install a hardwood floor on your own. Unlike common hardwood flooring that needs to be glued or nailed down, you just have to lay down the floating floor over thin-foamed rubber pads. Here, there is no requirement of fastening it to subfloors.
Firstly, choose a floating-floor material of your choice. It is best to go with the wood having a reddish, rich hue that seems similar to mahogany or cherry. In the market, there are incredible products available, where there is no need of applying any finishing. Also, you can opt for products that comes with tapping and adhesive options, where you do not have to apply glue on them for attaching them to the floor. So, as soon as you lay down the flooring, your job is finished. Now, let’s know how to install hardwood flooring on your own!
How To Install A Hardwood Floor
1. Plan the floor layout
When you begin placing the planks across, always move from the left side of the room to the right. For accommodation contraction and expansion, leave a gap of about ½-inch between walls and the flooring, where it needs to be 2-inch for the last row. For determining the width of the last row, you have to measure the width of your room in inches. After that, subtract an inch for the expansion space of about ½-inch at the ending and starting walls. Next, divide the number by the width of the floor plank for finding the total number of rows needed to cover the entire room.
2. Prepare your room
If your room has a carpet, then remove it and other paddings for exposing the subfloor. In case, the room features a vinyl or wood floor, then install the hardwood floor on top of it. One can even lay down floating floors over concrete slabs. Regarding baseboard molding, it’s up to you whether you want to remove it or not. You can remove the old molding and install new baseboard and shoe molding after laying the flooring. Or else, leave it and conceal the opening using shoe molding afterward. However, keep in mind not to nail this molding to the floor but the wall.
Now, vacuum the subfloor and roll the foam-rubber bedding perpendicular to the plank’s direction. Choosing an 18-inch closed-cell, thick foam evens out trivial irregularities and assist cushion the floor. Next, place the foam bedding’s edges together and make sure that they do not overlap. For securing the seams, use a masking or duct tape of around 2 inches.
At every door, you have to trim the jambs and casings of the door for allowing the hardwood flooring to slip-up underneath. For this, you can use a flooring piece or a handsaw to assist you in this task.
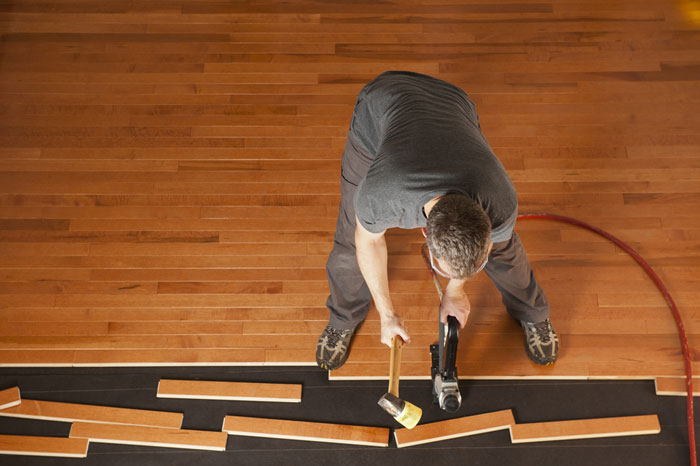
3. Begin laying planks
Now, place the first row of flooring planks by ensuring the last plank is about 8-inch long. If required, trim the very first plant so that the last piece can be long enough. All planks between the first and the last one will retain full length. Thus, you can cut the first or the last one only. Next, you can put ½-inch thick spacers between your wall and the plank.
Keep the second flooring plant next to the first one. With the help of a hammer, you can connect these two planks. So, continue to install planks in the very first row. For cutting the plank length of the last flooring plank, use a saber saw or a handsaw. While cutting using a jigsaw, hold your plank upside down for avoiding splintering the plank top. Keep the side up while using a handsaw.
4. Continue to lay planks
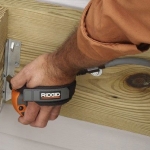
For the second row, start installing the planks, where the first plank’s end will be set against spacer blocks. Tap the plank onto the first row of the flooring in order to lock tongue-and-groove joints. Next, close these joints with a long-tapping block and hammer. Keep on doing but ensure to leave spaces between your walls and the flooring.
If required, notch the plank for fitting around a closet opening or wall corner. While notching the flooring plank, maintain a ½-inch space between the wall and the notch. When you reach the far wall, you have to rip planks to width in the last row with the help of a saber saw or a circular saw. Plus, maintain the expansion space between the wall and the last row. Using a hammer, place the planks into a proper place while closing the joints. Now, hook the bar’s lip on the flooring plank and after that, click on its anvil.
5. Finishing
Hide the expansion space using baseboard molding. It is important to note here that you do not have to nail this molding to the floor but the wall studs. Lastly, finish the task by nailing shoe molding to the baseboard. Before you install the molding, it is advisable to stain or paint it.
So, this is how to install a hardwood floor on your own. However, the task seems simple but not possible for all. If all this seems overwhelming to you, it is better to take the help of professionals. The construction agency assist you in building your dream home. So, what are you waiting for now? Contact them now for changing your dull, boring flooring to striking hardwood flooring in a few days. Or take the help of the above mentioned instructions for installing the hardwood floor. It is better to go for any construction agency for constructing a better place to live in.


Speak Your Mind