You could be embarking on a home improvement journey, or involved in a fixer upper at some great historic house. Maybe you found an understated piece of furniture at the flea market, and you are on the mission to make it great again. Deconstructing the timeless pieces of furniture can be a piece of cake. The hard work comes in when you have to pull out nails from the delicate pieces of wood.
Worry not. Here we will show you how to remove nail gun nails. From finishing nails to brad nails and even headless nails. Let’s begin, shall we?
How to Remove Nail Gun Nails
Before we can embark on this task, there are a few tools you might need that will come in handy.

Requirements: End-cutting Pliers, Putty Knife, a Hammer and a Hand Drill
To quickly pull nails from drywall; first, you need your end-cutting pliers. Hold the head of the nail with the end cutting pliers and gently rock the nail to and fro as it slides out of the drywall. Keep securing the end-cutting pliers closer to the wall and repeat the rocking motion until the nail is free.
The second method will involve the putty knife and a hammer, just in case you do not own some end-cutting pliers. Place the putty knife between the head of the nail and the drywall. Use the hammer’s claws to hold the nail head and pull the nail out of the drywall. We use the putty knife to ensure the hammer’s metal does not damage the drywall during this operation.
An even easier solution will need you to utilize the power of a hand drill. Hand drills come in handy when you need to remove nails that are deeply embedded in the wood. All you need to do is remove the drill bit from the adjustable chuck, align and tighten the chuck over the nail head. With the nail head tightly secured on the chuck, pull the nail out by setting the hand drill in reverse.
If you are working with delicate trims, here is another way of removing nail gun nails. Use your end-cutting pliers to cut off the nail head. Using the same end-cutting pliers, grasp the nail from behind the trim and pull out. This method will prevent your trimming from splitting.
Now on to some applied physics. This process helps tame those tough, unyielding larger nails. Take a piece of wood scrap and place it next to this stuck nail. Grab your hammer and use its claws to grasp the nail head. The wood scrap will create a fulcrum that you can angle your hammer on as you pull out the nail. This is work made easier.
Top 3 Best Nail Guns
These are top 3 best nail guns comparison table which will help you to make the best choice for your woodworking projects easily:
| Nail Gun | Image | Power Source | Magazine Capacity | Shipping | Editor's Rating | Price |
|---|---|---|---|---|---|---|
| BOSTITCH F21PL Round Head 1-1/2-Inch to 3-1/2-Inch Framing Nailer | 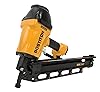 | Cordless-Electric | 60 Nails | FREE Shipping |  (4.4 / 5) (4.4 / 5) | See on Amazon |
| Hitachi NT65MA4 1-1/4 Inch to 2-1/2 Inch 15-Gauge Angled Finish Nailer | 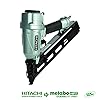 | Pneumatic | 100 Nails | FREE Shipping |  (4.6 / 5) (4.6 / 5) | See on Amazon |
| Hitachi NT50AE2 18-Gauge 5/8-Inch to 2-Inch Brad Nailer | 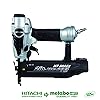 | Pneumatic | 100 Nails | FREE Shipping | (4.4 / 5) | See on Amazon |
Related posts:
How to remove Brad Nails
If you have worked with a lot of finishing involving smaller, more delicate wood items, you must have come across the brad nail gun. Brad nail guns use brad nails. Brad nails are usually very fragile nails with small heads.
Here we will explain to you easy and stress-free ways of how to remove brad nails:
You will require A hammer, diagonal-cutting pliers, and a piece of wood scrap.
1. Using Pliers
As long as there is a portion of the brad nail sticking out of the wood, pliers come in very handy. All you need to do is use the pliers to grasp the brad nail before gently pulling it out. If the brad nail is a bit stuck, use the pliers to wiggle it about to loosen it from its hold.
When all else fails, pour a little water on the area surrounding the brad nail. The wood will absorb the water and begin to soften, making the brad easier to pull out.
2. Using a hammer and Pliers
The hammer is used in conjunction with the pair of pliers while removing the Brad nail. We use the pliers to grip the Brad nail’s stem. We use the hammer’s claws, above the pliers, to trap the Brad nail head. Ensure that the pliers have a good grip on the nail head so that the Brad nail can come out swiftly.
Do not use the hammer on its own to remove the Brad nail since the metal on the hammer will cause dents on your trim work. Remember to work gently while removing the brad nail. Apply too much pressure, and the Brad nail may break. You do not want to go through that.
3. Using a hammer and Wood scraps
For this method, we use the wood scraps to provide a lever on which the hammer can turn and pull out the brad nail. As mentioned earlier, the hammer’s metal can cause dents on the trims and damage your finishing.
If the Brad nail is flush with the surface or countersunk, the previous three methods may not apply. You will need to access the back of the wood piece you are working on to gain access to the other end of the brad nail. With the rear end of the brad nail in sight, repeat method II or method III to successfully remove the nail.
How to Remove Finishing Nails
For this particular challenge, the aim is to eliminate the finishing nails leaving little to no damage to the wood you are working on. The following will be your requirements:
Requirements: diagonal cutting pliers, a hammer, a pry bar, some wood filler, sandpaper and a palette knife.
Step 1
Before you can pull the finishing nail out, you need to gain access to its rear end. In this case, you will take your pry bar and gently loosen the moldings from the walls. The goal here is to expose the back end of the finishing nail so that you can grasp and pull out the finishing nail.
Step 2(a)
In case you have no access to the back end, you will use your diagonal cutting pliers to grip below the finishing nail head. Once you have a good grip going, gently wiggle the pliers while pulling out the finishing nail. Repeat the process until the nail is out.
Step 2(b)
Using your pair of pliers, grip the rear end of the finishing nail and pull out. If the finishing nail seems stuck, use the hammer to pull it out while keeping the pliers secure at the base. You can use some wood scraps to provide a lever for the hammer too, in case you do not own pliers.
Step 3
Once the nail is out, use your sand paper to smoothen the holes. Remember to use the appropriate sandpaper for the wood you are working on. Once the holes are smooth enough, apply some wood filler to the holes using the palette knife. Wait for the wood filler to dry before sanding the area again for a smooth, clean look. Now you can finish off the piece of wood to your satisfaction.

How to Remove Headless Nails
The technique here is pretty similar to what we have previously discussed. We will lay down all the basics for you anyway. Here are your requirements for this task:
Requirements: Vise-grip pliers, a hammer, a block of wood.
Step 1
You will take your piece of wood block and lay it next to the nail you wish to remove. This piece of wood block, or even any kind of wood scrap, will act as a lever while using your hammer. Also, they prevent damage to your wood finishing that the hammer’s metal could cause when used on its own.
Step 2
Take your hammer and secure the nail between its claws. If you have a pry bar instead, you can use it too. The goal here is to slide the nail out of the wood with as much minimal damage as possible.
Step 3
To prevent your hammer or your pry bar from slipping while you work to get the nail out, use the vise-grip pliers to secure the nail under the hammer. Diagonal-cutting pliers can also be used in place of the vise-grip pliers.
Step 4
Pull the hammer, or the pry bar, back, until the nail is successfully dislodged from the wood. If the wood you are working with is very brittle, remember to dab some water around the nail area. The water will soften the wood and assist in quickly sliding off the nail.
Conclusion
So there you have it. We have meticulously laid out the details on how to remove nail gun nails. The challenge is almost always pretty straight forward. You must always have at least a hammer and some pliers while tackling this problem.
We have broken down the art of setting free Brad nails, finishing nails and also headless nails so that you can proceed with your restoration projects in peace. No matter what kind of furniture what age of the wood, either soft or hard wood, these methods apply to all. Master each and every one before they come in handy in the future.


Speak Your Mind